Visualizzazione post con etichetta copics italia DT post. Mostra tutti i post

venerdì 28 marzo 2014

A not traditional confirmation card with My Bestie Copic DT post


Hi , it is spring and therefor also time of lots of celebrations
as christenings, confirmations, weddings etc.

 This is my non traditional confirmation card.
I have prepared it for the COPIC ITALY blog.

The confirmation  is a special occassion 
but the card does not have to be too serious ,
a lot of people love to see more "young people / fun " cards.

Anyway this image is suitable according to me , 
because she  has these lovely innocent big eyes.
This My Bestie digi from Sherri Baldy  is called Daffodila, img 660

To colour the image up I have used my new gray copic sketch markers of the T group.
You might know copic has 4 gray groups.

The W ( warm gray ) 
The C ( cool gray )
The T ( toner gray )
The N ( neutral gray )


copics I have used : 

skin : E 000, E 00, E 11 
cheeks : E 20, E 22
eyes : B 12, B 16 , multiliner black 0.3
lips : E 35, E 37
hair : YR 20, YR 21, YR 23, YR 24
clothes  : T 0, T 1, T 3, T 5, T 7
R 27, R 29, R 59
B 12, B 16
grass :  YG 23, YG 91, YG 95
flowers : YR 23, Y 18
shadows around the image : B 0000 , B 00, B 02


Last wednesday I had my  second  ECCP class ( advanced level )
 with my talented pupils, Sabrina, Camilla, Sabrina , Stefania and Raffaella .
It is great to share the "secrets and tips " how to use the copic markers.

In this class we had a closer look how to colour 
different styles of hair, different colours of skin , shadows around images
and shadows in general . 

But it is also a great oppertunity to share an afternoon with creative people,
you can always learn from eachother, and have a laugh !
The class was held at Canzonetti , L'arte in vetrina, the hobbyshop of Albano ( near Rome ).
At the end all students received their "diploma" , 
the prove that they have attended the official 
European Copic Colouring Program

In may we will do the special I class..as soon as the date is fixed I will let you know.
In this class we will do folds, distress colouring with copics, 
 confetti shadow and the feathering technique . 

Challenge: 

My Bestie Deutschland - anything goes with Bestie

Besties Challenge - baby or kid cards ( kid )

My Besties Aussie - use ribbon ( lace ribbon )

Hobbycutz - girly but no pink

Hugs Blankina


domenica 16 marzo 2014

Tutorial monochromatic copic colouring and bloghop Loves Rubberstamps


Today a double post for you...
First of all my monochrome copic colouring tutorial.
I have prepared this post for COPIC ITALIA ...
and another monochromatic card for the 
 Sunday Inspirational card for the LRS bloghop..

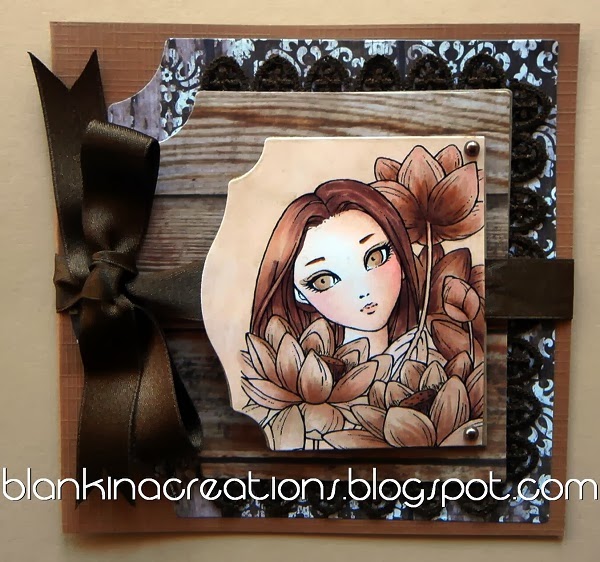
This lovely digi is from Aurora Wings called ,
Lotus sprite big eye
you can find this and other of  Mitzi's work here
I think she is so talented!
She has a challengeblog now, see link beneath.
And they are lovely to colour up.

Monochromatic colouring means use one colour in different shades.
With copics you will not have problems to find your shades of one colour..
I have chosen my beloved "E" family of the copics.
These are all EARTH colours.


step 1:
I have coloured her face, 
I have used the E 000, E 00, E 11, R 20 for the left side ( the lighter part )
and
I have used the E 000, E 00, E 13 , R 20 for the right side  ( the darker side )


step 2: 
Have started to colour her hair,
first I have added E 21 where I want to have the darker shadows.


step 3:
Have passed the darket E 25 colour


step 4:
Now it is time to pass the darkest colour E 29


step 5 :
Now I start blending with the light E 21,
the places where I wanted the lightest part are left white


step 6 :
Pass the darker E 25 again , repeat these colours untill I like the result.
At the final the white part is colored with the lightest colour E 21.


step 7:
Now I start to colour the lotus, starting with E 31.
I do not cover the whole, I leave some white parts.


step 8:
Over the E 31 I start to add the darker E 34,
still leaving the white parts white


step 9:

nother layer of colour on top, this time with E 35


step 10:
Then I have blended the white parts with the coloured parts with my E 11.
On the right side ( shadow side ) of the digi I have also used E 37 for the Lotus flowers
and E 13 to blend.

The papers are from :
 My mind's eye, 
the dies are from MFT.


I have used a double folded piece of kraft, 
and left one side out of the die in able to create a "booklet"
inside I have stamped the text from MFT.
( Products Links below ).
When you open the ribbon you see this..


Another monochrome card for you today;
Welcome to the Loves Rubberstamps weekly Sensational Sunday Blog Hop
The Design Team has created some gorgeous projects for your Inspiration. 
Check out each link and leave a comment. 

If you get lost along the way, each stop will have a full list of links. 
One of the Design Team posts is the hop's Sensational Sunday Sweet Spot 
and a name will be drawn from that list of comments
 to be in a monthly drawing for a 
$20 Loves Rubberstamps Gift Voucher! 

We will draw the winner of the Voucher the 1st Sunday of each month!

 Remember, you have until 8:00 pm CST Saturday to leave your comments!

Blankina  ( you are here )


products used :


Please join the hop !!
You could also still enter our 
LOVES RUBBERSTAMPS 

Hope you have enjoyed my tutorial too..

Challenge:

Bunny Zoe - monochrome

storie di carta - fiori / flowers 


Hugs Blankina


sabato 1 marzo 2014

Tutorial Copic doodeling around a stamp copic Italia DT post


Hi again, are you ready for a little copic doodeling tutorial ?
Some might have seen my first copic doodeling tutorial  here ( this was a cover of A 4 size ).

This one is less difficult , I have done some copic doodeling around the stamp.

This sweetie is one of the Miss Anya night out stamp set from The Greeting Farm ,
stamped with memento black tuxedo ink onto perfect colouring paper 
and colored with copics. On her dress I have added some dots with a white gelpen.
See list below.


Step 1 

colour up your stamped image,
and make some doodeling around
in my case some "bubbles"

step 2


add more lines or other doodles

step 3


add a frame with your copic multi liner ( black SP 0.3 )
and colour the stripes with copics and copic multi liner

step 4


add some scallopes around the frame

step 5


pass a few times with your copic multi liner
and fill in the rest with copic colours


that's all , you can now glue it onto your card..

copic products used:

copic multiliner sp black 0.3
perfect colouring paper
hair: E 08, E 09, E 15
skin: E 00, E 02, E11
dress: BG 11, BG 15, BG 18
border: BG 11, BG 15, BG 18, B 39, B 45

Ofcourse you can see more tutorials , cards and manga 
please visit and follow the COPIC ITALIA BLOG

Thanks for your visit!

Hugs Blankina

domenica 16 febbraio 2014

With love special Valentines Card Copic Italia Dt post


Hi all, 

Finally some sun..I have been in the mountains yesterday with my family.
Today after having done my duty as mum and housewife it is time to share this card with you.

This is the Valentine's card which I had prepared for my DT post at COPIC ITALIA .
The colouring might be quite simple but this image is soo cute..
And I have invented a special shape.


When you open the bow, this will be revealed.
The heart die is from Cuttlebug ( one of the first I had ever bought ).
The circles are cut with a Nellie's choice die (MFD).
The sentiments are from AmyRstamps.
The papers are from Action.
The sweet stamp from LOTV is called Fabulous-Flower


Be my valentine!! And happy valentine's day..mwah *kisses*.
Ofcourse the right part can be opened too,
here there is plenty of space to write something sweet.


The backside is decorated too..
XOXO Hugs& kisses !
I thought it was a nice mix of papers..flowers, dots and spots.


A little close up of the front, the stamp is stamped with black tuxedo Memento ink
and coloured with these copics.


For the complete list with numbers
please visit my post on the COPIC ITALIA blog.

Challenge:

LOTV- inspired by a song ( You are mine )

Hugs Blankina

sabato 1 febbraio 2014

Special birthday card copic Italia DT post


A special birthday card with a pretty butterfly on the front,
I have made this special fold card for my Copic Italia DT post.

Ofcourse coloured with my copics, below you can find a complete list.


I love to make special cards, this one has different folds.
This is what it looks like when you open the bow.


All open , one side of the card.
I have used design papers from Action and Marianne Design.
The plain papers are from Foliart ( they have this pretty linnen structure.
Distressed the edges.
The front stamp ( isn't it pretty! ) and happy birthday die are from Joy!
The other stamps are from The Greeting Farm and Kaisercraft.
The heart die is from Marianne Design.


A close up from the butterfly.

I have used the following copics  :

The butterfly: 

E 00, E 02, E 04, E 13, E 18,
    E 31, E 33, E 34, E 35, E 37, E 57,
     E 71, E 79, E 93, R 02, RV 93 

the postcard / shadows: 

YG 91, YG 95, BG 93, G 000, W 00

Hope you have enjoyed this post...please check out all copic blogs for inspiration..
See left sidebar, thanks for your visit !

Challenge:
Inky chicks - bingo ( lace-ribbon-butterflies )


Hugs Blankina


sabato 18 gennaio 2014

Copic doodeling tutorial for Copic Italia DT post


Today I am showing you something completely different.
I have prepared an tutorial how to make a special cover for the
This is a cover in A 4 size.
All of us do make doodles from time to time.
Without thinking we put down shapes , dots, lines onto the paper.

When I was doing highschool one of my favourite topics was design / drawing.
A perfect way to express my creativity.
Besides copying and draw real objects
I loved to draw abstract in the "doodeling " style.

At the time I did not have any copics,
that would have been fun!?
From the past to the present, I had lot of fun making this cover.
And therefore I have decided to share this positive experience with you copic lovers.

Ofcourse to do this A 4 size you need a lot of time
( It took me a few days ) and a bit of fantasy!
I advice you to start with a smaller size.

Ready for a step to step tutorial?


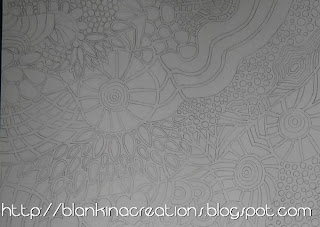
I have used a sheet of perfect colouring paper and a pencil.
Just draw shapes / lines / dots , let your fantasy flow..
don't think but just draw..
It is very relaxing!


Than I have used my copic multi liner and black copic marker ( 100 )


Passed over the pencil with the black multi liner  ( 0.3 )


Afterwards the bigger lines where passed with the black copic marker ( 100 )


You get this look


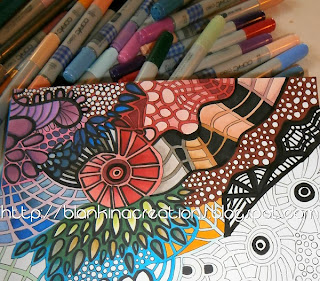
Start colouring with your copic markers...


lots of pretty copic colours


This was the result but I was not happy yet...


So I have added more black..
And this is the final result.

Did I inspire you too??
I promise you it is soo relaxing!

The copics I have used are :

GRUPPO E :02, 04, 11, 13, 18, 25, 31, 33, 35, 37, 57, 79
GRUPPO B :05, 23, 28 , 45, 93, 95, 97
100, GRUPPO R 10, 22, 27, 29, 32, 35, 59
GRUPPO RV 04, 23, 29, 34, 59, GRUPPO YR 02, 20 , 23
GRUPPO Y 38, GRUPPO YG 01, 23, 91, 95, GRUPPO G 29
GRUPPO W 2, 3, 5, 7, GRUPPO C 00, 3, 5, 
GRUPPO V 05, 09, 12, 17, GRUPPO BV 08
multi liner nero ( 0.3 )

Hope you have enjoyed my tutorial..
Ofcourse you could also make a card with a small version!

Hugs Blankina


sabato 4 gennaio 2014

Copic markers and multi liner Copics Italia DT post


Hi all, today I am showing what I have made for my second Copic Italy DT post.
I did not only use my copic markers but also a copic multiliner.
I have several of them...they are great to write or to add details, 
or like what I have done...to decorate the borders of the paper.


I have used a seppia coloured multi liner with a 0.1 point.
Please check out the whole selection here .


This is a close up, some dots and stripes ( faux stitching ) 
to decorate the edges of the perfect colouring paper.
The brown edging was done with the wide nib side of my sketchmarker E 33.
The veil was coloured with C 00.
And I have added some white dots ( with a white gel pen ) on the hat and borders of the dress.


Isn,t it a cute Magnolia stamp? It was a gift..from Siv. 
I have coloured her with some of my favourite colour combo's ; pink and browns.

The pretty dp is from Marianne Design ( Eline's buitenhuis, dolls house PB 7042 ),
the kraft paper underneath is from Joy.
The lace ribbon is from MD.
The word Post card is a detail from a stamp from Joy.


Copics used :

face / skin : E 00 ,  E 02, E 11 , E 13, E 21, YR 20 
hair : E 21, E 25, E 29
hat and borders of the dress : E 00, E 04 
veil : C00
dress : E 31, E 33, E35
socks : E 00, E 02, E 04
shoes : E 25, E 31, E 33
flowers : R 20, R 22, R 27 , YG 91, YG 95
tag "Post Card" : R 20, R 22
decorations on border of the paper  : multi liner seppia, 0,1

paper : perfect colouring paper

Challenges: 

Totally Tilda Challenge - anything goes

Simply Magnolia - favourite or newest Tilda ( newest Tilda )

Marvelous Magnolia Challenge - anything goes

Dutch stamp chickies - anything goes

Copic Markers Sverige - anything goes

Hope you have enjoyed my post,
 to see my birthday post for Melissa please see the previous post

Hugs Blankina


Related Posts Plugin for WordPress, Blogger...