Visualizzazione post con etichetta copic activator. Mostra tutti i post

sabato 14 aprile 2018

Tutorial creative recycling , Copic Activator & Copic


Buongiorno, goodmorning, goedenmorgen,

Vi faccio veder un modo simpatico di riciclare gli scarti dei timbri di gomma,
insieme a qualche pennarello Copic e Copic activator.
Per tutto il post in italiano potete visitare Copic Italia.

I will show you a fun way to recycle your remaing pieces of rubber stamps 
( those who remain after having trimmed the images )
together with some Copic markers and some Copic Activator.
You can find the complete post in english on the Copic Europe blog.

Ik wil jullie graag laten zien hoe je op een leuke manier je rubber stempel rest stukjes kunt gebruiken
te samen met wat Copic en Copic Activator. Hieronder de hele uitleg in het Nederlands.


Je hebt nodig:

Copic activator
Wat Copic , ik heb deze kleuren gebruikt RV 04, RV 14 and R 59 
Chromolux papier of nader stevig glossy ( glanzend ) papier
een acryl blok of stamping tool
en natuurlijk wat rubber stempel "rest afval"


Ik heb de stukken geknipt in de vorm die ik mooi vond 


Toen heb ik een soort patroon gemaakt met die stukjes
en op mijn stamping tool bevestigd
( Als je geen stamping tool hebt kan je het patroon op een acryl blok bevestigen

Mocht de rest stukjes niet gemonteerd zijn op ez mount 
kan je altijd een vel tack n peel gebruiken om ze le laten kleven


Ik heb een stuk Chromolux paier geknipt
en op mijn stamping tool bevestigd met de magneten 
alvoor ik begin te kleuren ceck in even op het patroon goed op het papier past


Nu lekker kleuren maar,
ik ben begonnen met mijn RV kleurtjes


Daarna heb ik og nog wat R 59 aangebracht


Op de gekleurde stukjes rubber activator gesproeid
en direct mijn stamping tool gedraaid en flink stevig gedrukt op de glanzende kant van het papier


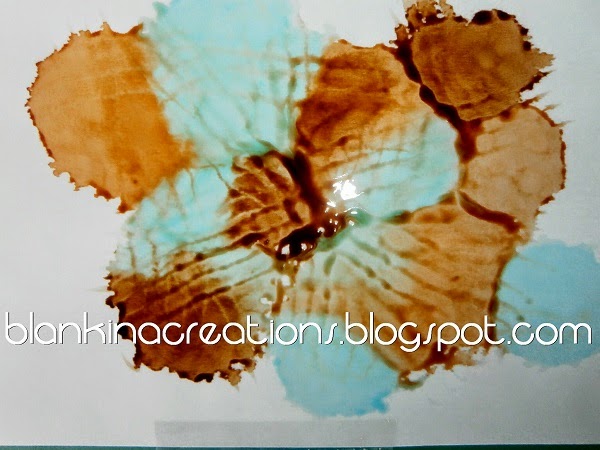
Dit is het  resultaat


Het tweede stuk papier heb ik anders beinkt,
deze keer heb ik op de rubber stukjes gekleurd en gesprayed
maar toen het papier op de stukjes gedurkt met een roller

Je kunt de rubberstukjes meteen schoonmaken met wat activator 
zodat je ze later ook met andere kleurtje kunt gebruiken.


Dit was mijn tweede stuk papier


Bloementjes gestanst met mijn MFT stans
en ook nog een tekststempel met staz-on inkt op de achergrond gestempeld
die ik met een vierkante stans had gestanst.


Nu nog een grappige manier om de bloemen te bevestigen ,
in plaats van lijm wat eyelets gebruikt , met behulp van mijn bigbite crop-a-dile 


Het resultaat, een lekker vrolijk bloemen kaartje.

Ik hoop dat jullie de tutorial leuk vonden en wie weet gaan jullie het zelf ook eens proberen


sabato 3 giugno 2017

Dreaming of a blue green sea Copic Europe DT post !


Ciao a tutti, hi all, hallo allemaal,

Oggi vi faccio vedere il mio biglietto che ho fatto per Copic Europa,
se volete vedere tutte le foto del processo andate a vedere direttamente qui

Today I am showing you my card which I have made for Copic Europe,
if you would like to see all photos step by step please visit the blog here.

Vandaag laat ik jullie mijn kaart zien die ik voor Copic Europa heb gemaakt,
mochten jullie alle stap voor stap foto's willen zien ga dan even hier kijken.


Ecco i prodotti che ho usato..
Here are some of the products used..
Hier zijn wat van de artikelen die ik heb gebruikt.


Questo è la foto del biglietto al completo.
This is the photo of the whole card.
Dit is de foto van de hele kaart.


Questo è un close up del pannello che ho creato con i Copic e l'activator.
Come potete vedere sono pronto per l'estate, posso tuffarmi nel mare blu verde.

This is a close up of the panel made with the Copic pens and the activator spray.
As you can see I am ready for summer , I can dive into my blue green sea .

Dit is een close up foto van het paneeltje wat ik met Copic and activator heb gemaakt.
Zoals jullie kunnen zien ben ik klaar voor de zomer,
 ik kan zo een duikje nemen in mijn blauw groene zee.

Copic:
BG 0000, BG 01, BG 07
G 12
Copic Opaque white
Activator

other products used :

rubberstamp Katzelkraft ( goutelettes )
rubberstamp Impression Obsession ( Shells )
clearstamp Joy crafts ( Under the sea )
inks : olive green Staz-om , distress ink broken china ( fot the paper edges )
die Marianne Design ( Anja's frilly square LR 0470, Anja's shells LR 0471 )
paper Marianne Design ( aqua color PK 9147 )
plain paper ( Avec )
Chromolux glossy paper 


venerdì 3 marzo 2017

Sognando scrap challenge DT post


Buongiorno, goodmorning, goedenmorgen,

Oggi vi faccio vedere il mio biglietto con un digi di Glimps.
Un po' di allegria, colorata e profumata...
E' la mia ispirazione per la nuova sfida di Sognando scrap
che questo mese ha come tema...

Today I am showing you my card with a digi of Glimps.
A bit of fun, colours and smell of flowers...
It is my inspiration for the new challenge at Sognando scrap
this month we have as theme...

Vandaag laat ik jullie mijn kaart zien met een digi van Glimps.
Lekker vrolijk, kleurrijk en zalig bloemen ruikend...
Het is mijn inspiratie voor de nieuwe challenge van Sognando scrap
deze maand hebben we als tema...

PROFUMO DI PRIMAVERA
THE SMELL OF SPRING
DE GEUR VAN HET VOORJAAR


digi Glimps : Violetta

The digi was coloured with my Copic,
also I have played around with my Copic
and some activator spray for the background.

The sentiments are from Whimsy..
take time to smell the flowers
prendi tempo di sentire il profumo dei fiori
neem tijd om de geur van de bloemen te ruiken

Copic:

pelle / skin : E 30, E 31, E 34, E 93, E 95, E 02
occhi / eyes : BG 11, BG 13, BG 45
capelli / hair : E 49, E 57, E 39
vestito / dress : V 000, V 01, V 04, V 12
prato / grass : YG 03, Yg 06, G 21, G 24

Challenge:

Cute card thursday - anything goes
http://cutecardthursday.blogspot.it/2017/03/challenge-467-anything-goes.html

addicted to stamps - anything goes
http://addictedtostamps-challenge.blogspot.it/2017/03/challenge-251-anything-goes.html


sabato 26 novembre 2016

Copic..not only for paper..Copic Italia DT post


Buongiorno, 

La settimana scorsa ho dimostrato diverse tecniche con i Copic 
durante la fiera Hobbyshow ad Bastia Umbra (PG) . 
Tante persone mi hanno chiesto se erano colori per il tessuto.

Ho spiegato che i pennarelli Copic nascono per la carta ,
 per disegnare a mano libero , per disegnare dei fumetti,
per creare dei disegni tecnici
 o ad colorare dei timbri per esempio.

Volete sapere cos'altro si colora con i Copic? 
Andate a vederlo sul blog di Copic Italia.


Not only paper can be coloured with your Copic.
Please find out more on the Copic blog Italy.

Niet alleen papier kan gekleurd worden met je Copic.
Kijk voor meer info op het Copic blog Italie.


Poi avete visto il nuovo colore di Copic multiliner?
  Per aggiungere delle finte cuciture ho usato il nuovo colore di Copic Multiliner : lavanda.

Stupendo ! 

Have you seen the  new Copic multiliner colour yet? A suuper pretty lavender ! 

Hebben jullie de nieuwe kleur multiliners al gezien? Kleur lavendel, super mooi!

Copic :

BV 04, BV 08
Copic Multiliner Lavender 0.3 
Activator 


domenica 6 novembre 2016

Sfondi con i Copic & activator


Stamattina ho fatto una dimostrazione da Canzonetti..qualcosa diverso con i Copics..
ho creato dei sfondi con i Copics e l'uso dell'activator . 
Poi uno puo timbrare , usare i copic multiliner per decorare o mettere delle fustellate sopra
 per creare dei tag o segnilibri o per un biglietto per esempio. 
La prossima dimostrazione farò al Hobbyshow di Bastia Umbra 
presso lo stand di Ritagli di Tempo.
( 18-19-20 novembre)


This morning I have demonstrated how you can use your Copics in a different way using the Copic Activator. Such fun afterwards you can stamp them, decorate them with die cuts or with a copic multiliner. Perfect to make tags or boomarks or too use on your cards for example.
I will demonstrate these kind of tags during the Hobbyshow in Bastia Umbra too..at the Ritagli di Tempo stand. ( 18-19-20 november ).


sample


Vanmorgen heb ik demonstraties gegeven hoe je Copics op een andere manier kan gebruiken.
Heel leuk om te doen, met behulp van de Copic activator maak je de achtergrond die je later kunt bestempelen , kunt decoreren met je copic multiliner of met stansjes. Leuk als tag of boekenlegger of voor op je kaartjes bijvoorbeeld, De volgende demonstratie geef ik op de Hobbyshow in Bastia Umbra bij de Ritagli di Tempo stand. ( 18-19-20 november ).


sabato 12 aprile 2014

Tutorial : create a background with various copic ink


Hi again, I have created a little tutorial for the COPIC ITALIA BLOG.
Various ink is not only to fill up your copics when they are empty..
you can also create fun backgrounds.

I have tried to photograph each step, but it was not easy..
I could use an assistent at these moments.

You will need a piece of shiny paper ( vellum ).


Let the drops fall out of the various ink bottle onto your paper.


Spray your copic activator on it.


More or less it will look like this.


I have used a foam stamp to create a "design",
without ink ofcourse.


On the other sample I have used a plastic fork.


Here is when I have stamped the foam stamp without ink.


Here I have created the stripes with the fork.


You can also use copics to add details.


And  when marker.


This is my first card , a male birthday card.
The sentiment is from Kaisercraft.

I have used these colours  :
various ink ( refill ) E 33, E 57 e B 00.


This is the second card...
I have just added some lace, machine stitching and a text stamp. 

It was fun to experimentate with my copic refills
hope you will try it too and that my little tutorial was useful !

Hugs Blankina


Related Posts Plugin for WordPress, Blogger...